Woodworker Chuck
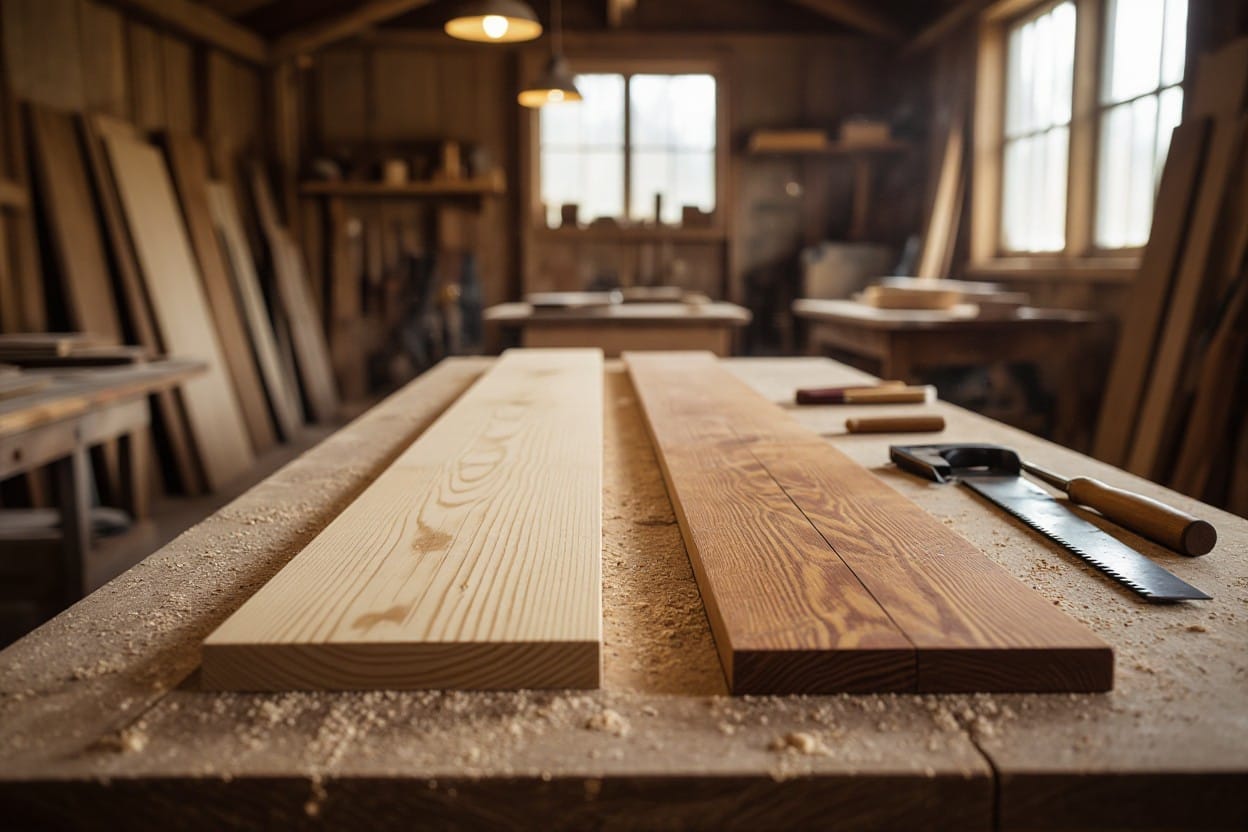
Lumber for woodworker
There’s a lot to consider when selecting lumber for your woodworking projects, and understanding the different types of wood and their characteristics can make all the difference. By choosing the right wood, you ensure your creations are both durable and aesthetically pleasing. However, using unstable or inappropriate lumber can lead to warping, cracking, and structural failure. In this guide, you’ll learn how to identify the best lumber options that match your project’s needs, helping you work more efficiently and achieve professional results every time.
Key Takeaways:
- Choosing between hardwood and softwood depends on the project’s needs; harder woods suit surfaces exposed to wear, while softer woods work well for hidden or less stressed parts.
- Quartersawn wood offers greater dimensional stability and reduced movement with humidity changes, making it ideal for furniture parts that require strength and minimal warping.
- Understanding different wood milling cuts—such as flat sawn, quartersawn, and rift sawn—helps in selecting lumber with the best stability and appearance for specific woodworking projects.

The Battle of Softwoods and Hardwoods
Unique Qualities of Hardwoods
Hardwoods originate from deciduous trees, which shed their leaves each fall, and generally feature a denser cellular structure. This density often translates into greater strength and durability, making species like white oak, maple, and cherry excellent choices for furniture surfaces and structural components that must resist wear and dents. You’ll notice hardwoods tend to have more complex grain patterns, which enhance the aesthetic value of your project, especially when finishing. Beyond strength and looks, many hardwoods provide varied workability; for example, cherry carves beautifully and ages to a rich patina, while hard maple is prized for its resistance to abrasion and impact.
On the downside, hardwood lumber can be significantly more expensive than softwood, which might not be ideal if your project includes parts that won’t be visible or subjected to heavy use. In certain situations, hardwoods also tend to react more slowly to humidity changes due to their density, meaning you need to factor in proper acclimation times before using them. Still, for heirloom-quality furniture or toolmaking, you’ll often want to include hardwood components to maximize strength, stability, and longevity in your work.
Characteristics of Softwoods
Softwoods come from coniferous trees, such as pines, spruces, and firs. They typically grow faster than hardwoods, which results in a lighter, less dense wood that is easier to work with hand tools and machines alike. Softwoods like white pine and Douglas fir are commonly used for framing, siding, or parts of furniture that don’t undergo heavy wear but still require strength. Their straight, even grain often makes for clean cuts and smooth surfaces, especially when planed properly. You’ll find softwoods generally take nails, screws, and adhesives better in many cases, which benefits many construction and cabinetry applications.
One downside is that softwoods usually lack the same hardness and abrasion resistance as hardwoods, so they may dent or scratch more easily when used in high-traffic or impact-prone areas. Some species can also be prone to resin bleeding, which may complicate finishing if not properly treated or sealed. Despite these restrictions, softwoods offer an economical option and can lend themselves well to projects where weight savings or ease of machining take priority.
Species like spruce and fir are often favored for musical instruments and millwork because of their acoustic qualities and dimensional stability, respectively. Those qualities mean softwoods still have a strong presence in fine woodworking, especially when you balance them with hardwood components.
Understanding the Janka Wood Hardness Test
The Janka hardness test provides a reliable way to compare the relative hardness of different woods by measuring the force required to embed a 0.444-inch steel ball halfway into a wood sample. For example, hard maple scores around 1,450 on the Janka scale, while white oak is at 1,360, showing their robustness. On the other hand, Eastern white pine sits near 420, illustrating its softness relative to hardwoods. Knowing these values helps you predict how lumber will hold up to everyday wear, especially for furniture surfaces or flooring.
You’ll find the Janka test results particularly useful when you want to avoid overpaying for hardwoods that may not outperform cheaper softwoods in your specific application. Some softwoods like Southern yellow pine (whose Janka hardness surpasses that of some hardwoods) challenge the assumption that hardwood always means harder. By comparing these ratings, you can select wood that balances cost, workability, and durability according to your project’s needs.
The Janka scale doesn’t tell the whole story, though. It’s wise to consider other factors like grain structure, wood stability, and how the wood responds to environmental conditions alongside its hardness rating. Still, keeping a Janka chart handy during lumber selection gives you an edge in choosing wood that will serve your project best over time.
Exploring Quartersawn Wood
Defining Quartersawn Lumber
Quartersawn lumber comes from logs that have been cut radially, slicing the log into quarters before sawing boards from each section. This results in wood where the growth rings run nearly perpendicular to the board’s face, typically at angles between 60 to 90 degrees. You can identify quartersawn wood by examining the end grain, where you’ll notice these mostly vertical rings, often appearing as tight, straight lines rather than the sweeping arcs found in flat sawn lumber.
This cut produces boards with a distinctive ray fleck pattern, especially noticeable in species like white oak, giving the wood an attractive, shimmering figure. Often more expensive due to the additional milling labor and lower yield from the log, quartersawn lumber puts you in a position to benefit from both its aesthetic qualities and its structural advantages.
Benefits of Quartersawn Wood in Projects
One of the standout features of quartersawn wood is its dimensional stability. The way it’s cut reduces wood’s tendency to cup, twist, or shrink across the width—a common issue with flat sawn boards. For furniture parts that demand tight joinery and fit, like door frames or drawer sides, using quartersawn lumber lowers the risk of movement-related failures, extending the lifespan of your work.
Quartersawn boards also offer superior wear resistance on surfaces that see repeated contact or mechanical stress. Hard woods like quarter sawn white oak or hard maple maintain their flatness under pressure better than flat sawn counterparts, making them ideal for table tops, flooring, and workbench surfaces where you expect dings and dents over time.
Additionally, quartersawn lumber resists warping in environments with fluctuating humidity—whether that’s the humid summers and dry winters common in many regions or spaces with unpredictable climate control. Choosing quartersawn wood lets you build furniture and tools that hold their shape and function without frequent adjustments or repairs, which can save both time and frustration down the road.
Navigating Wood Milling Cuts for Stability
Flat Sawn / Plain Sawn Wood: The Most Common Choice
Flat sawn lumber dominates the market because it’s the fastest and most economical way to mill boards. This cut reveals the iconic “cathedral” grain pattern on the face of the wood, which many woodworkers recognize immediately. You’ll find flat sawn boards in everything from basic furniture to flooring, largely due to their availability and lower cost. But the trade-off for this economical approach is increased movement across the board’s width, which means cups, twists, and warps are more common.
The orientation of growth rings in flat sawn lumber results in wood that tends to expand and contract more with changes in humidity. While it’s perfectly fine for many projects, you need to stay alert if your design calls for tight joinery or flat surfaces where warping could cause serious problems. For example, a tabletop made entirely of flat sawn boards can develop noticeable gaps or unevenness over time if not properly acclimated and sealed.
Rift Sawn Wood: A Step Up in Stability
Rift sawn lumber appears when the log is cut at an angle between flat and quartersawn methods, producing boards with a straight, narrow grain pattern that runs fairly parallel to the board’s edge. This cut maintains a more consistent grain angle, usually between 30 to 60 degrees relative to the surface, which gives it more dimensional stability than flat sawn. Rift sawn wood also displays an elegant, tight linear grain that many craftsmen prefer for its aesthetic appeal.
Its stability makes rift sawn lumber a frequent choice for components like furniture legs, trim, and architectural millwork where you want a neat grain and less unpredictable wood movement. Though it costs a bit more than flat sawn lumber, rift sawn boards often represent an effective middle ground between cost and performance in stability.
The challenge with rift sawn boards is that they produce more waste during milling compared to flat sawn, making them less common and more expensive. You might find it helpful to look for mixed rift and quartersawn sections at the lumberyard, which can occasionally be sourced as a compromise between cost, beauty, and stability.
Quartersawn Wood: The Stability Champion
Quartersawn wood is the go-to option when dimensional stability is a priority. Boards are cut perpendicular to the log’s growth rings, producing a vertical grain pattern on the board face. This cut keeps movement from expanding and contracting mostly across the width, reducing cupping and twisting significantly compared to other cuts. You’ll often notice the distinct ray fleck figure, especially in white oak, which adds both beauty and value to your projects.
This grain orientation gives quartersawn wood superior resistance to humidity changes, making it a preferred choice for chair legs, table aprons, and instrument making. It’s the trusted option when you want your parts to remain true over decades. The higher price tag on quartersawn lumber reflects the slower milling process and lower yield per log, but the longevity and performance can justify the investment.
Quartersawn boards tend to have straighter end grain lines and can be easier to finish evenly since the grain absorbs stains and oils more uniformly. For hand tools, as well as heirloom furniture, this cut provides a level of craftsmanship that pays dividends in stability and wear resistance.
Riven Wood: Nature’s Strength
Riven wood stands apart from sawn lumber because it’s split rather than cut, following the wood’s natural grain lines. This ancient milling method produces boards that align perfectly along the grain fibers, minimizing the chance of tearing or splitting under stress. Historically prized for boat-building and timber framing, riven wood combines rugged strength with excellent dimensional stability.
Pieces riven from a log will resist twisting better than some sawn lumber, since the wood’s cellular structure runs uninterrupted along the length. You’ll rarely find riven wood in modern woodworking shops, but it’s still favored for specific applications where durability and traditional authenticity matter.
Working with riven boards requires a different mindset, as their irregular surfaces and edges might need extra planing or trimming to fit contemporary joinery. When you’re looking for raw strength coupled with natural integrity, riven wood brings a unique character that sawn lumber can’t replicate.
Identifying and Avoiding Lumber Defects
The Impact of Knots on Aesthetics and Strength
Knots are natural features where branches once grew out of the tree, and they can dramatically affect both the look and structural integrity of your lumber. Some knots are tight and well integrated, creating unique and appealing grain patterns that many woodworkers cherish for their character. However, loose or dead knots can fall out or cause weak spots, often leading to cracks or splits around the knot area. These weaknesses might compromise your project's durability, especially in load-bearing pieces like table legs or chair frames.
Visually, knots can either enhance or detract from your work depending on their size, placement, and frequency. Large clusters of knots can overwhelm finer details, making it harder to achieve smooth finishes or precise joinery. Select boards with smaller or fewer knots for parts requiring strength and smooth surfaces, while you might preserve knotty boards for decorative elements where character is desirable. Keep an eye on discoloration or punky wood around knots, as that can indicate decay or insect damage.
Understanding Sapwood and Insect Damage
Sapwood is the outer, usually lighter-colored layer of a tree just beneath the bark, responsible for conducting water and nutrients during the tree’s life. It tends to be softer and less durable than the inner heartwood. Sapwood often attracts insects and decays more quickly when exposed to moisture. You’ll notice sapwood by its pale color, sometimes with a greenish or yellowish tint depending on the species.
Insect damage in lumber ranges from tiny pinholes left by wood-boring beetles to resin deposits and tunnels that compromise structural integrity. Sapwood is the most vulnerable to such attacks, especially in kiln-dried or improperly stored lumber. If you notice powdery sawdust near knots or sapwood areas, or tiny holes scattered across the surface, it’s a red flag. Avoid lumber with visible insect damage unless you plan to stabilize or treat it extensively.
In cases where you encounter sapwood, consider sealing or using it on non-structural parts that won’t be exposed to heavy wear or moisture. Treating sapwood with preservatives or finishes can extend its usable life. Some woods like white oak have naturally resistant sapwood, but species like pine often have very soft sapwood prone to decay.
Recognizing Wood Movement Defects
Wood’s natural dimensional changes manifest in several defect types, often caused by uneven drying or improper milling. One common defect is warping, which includes cupping, bowing, and twisting. These occur when one side of a board dries faster than the other, and selecting quartersawn or rift sawn lumber significantly reduces the risk. Visible checks and splits usually start at board ends where moisture loss is the highest.
Case hardening is a subtle problem that can catch you off guard. It happens when the outer layers dry and shrink while the inner wood remains moist, causing internal tension and potentially severe movement after your wood is cut or machined. You can test for case hardening by planing the wood and watching for sudden twisting or cracking. Avoid boards that look overly dry on the outside but have a heavier-than-expected weight, signaling trapped moisture inside.
Boards with spring or bow defects may not lie flat on your workbench, increasing sanding and jointing efforts and leading to unstable furniture parts. Sorting boards carefully at the lumber yard and testing them for stability with hand pressure and visual checks can save hours of frustration later.
When you inspect lumber, look beyond the surface and end grain. Check that the board lays relatively flat and doesn’t rock when rested on a reference surface. If you notice irregular grain patterns that suggest internal stress, it’s best to pass on those pieces for critical structural components.
The Hunt for Quality Lumber Sources
Local Saw Mills: Your Community Resource
Local saw mills often provide some of the best opportunities to get high-quality, freshly milled lumber. These mills usually source wood from nearby forests, which means the lumber is well suited to your local climate. You can often find a wider selection of species and cuts compared to big-box stores. Because the wood hasn’t been sitting on shelves for months, it typically retains better moisture levels and hasn’t dried out excessively or warped.
Visiting a local saw mill also lets you inspect the lumber in person, selecting boards with the end grain orientation and figure that fits your project’s needs. Many saw mill operators are knowledgeable and can offer advice on the best cuts to reduce wood movement, such as quartersawn sections, which can save you time searching elsewhere. Building a relationship with a saw mill can lead to access to specialty woods or custom milling services that hardware stores can’t provide.
Specialty Hobby Stores: A Hidden Gem
Many specialty hobby stores cater to woodworkers with curated lumber selections, including exotic species and sustainably sourced options. These stores might stock smaller quantities but offer premium quality boards that are milled and dried with woodworking projects in mind. They’re also great places to find figured or rare woods that add character and uniqueness to your work.
You’ll find these stores invaluable for specialized projects or fine woodworking pieces where grain pattern, texture, and wood quality really make a difference. Staff members tend to have experience with woodworking and can assist you in picking the right material for your specific needs, from softwoods for carving to hardwoods for durable furniture components.
It’s worth checking local listings or woodworking forums to discover hidden gems in your area—specialty shops that focus on craftsmanship rather than bulk volume often fly under the radar but deliver consistently high-caliber lumber.
Online Lumber Shopping: Pros and Cons
Buying lumber online opens up a vast marketplace where you can access rare woods and specialty cuts that are impossible to find locally. Online retailers often provide detailed product descriptions, Janka hardness ratings, and user reviews, helping you make informed choices without leaving your workshop. This is especially handy if you need lumber from a specific species or a large quantity for a big project.
However, the biggest challenge with online lumber shopping is the inability to physically inspect your boards before purchase. Variations in grain, figure, and defects like checks or knots aren’t always apparent in photos. Shipping costs can also add a significant amount to your budget, especially for heavy hardwoods, and the risk of damage during transit is a factor to consider.
| Pros | Cons |
|---|---|
| Access to a wide variety of species and grades | No ability to inspect boards in person before purchase |
| Convenient ordering from home or workshop | Shipping costs can be expensive |
| Detailed product info and online resources | Risk of damage or warping during shipping |
| Availability of specialty cuts and sizes | Longer wait times compared to local purchases |
| Can compare prices from multiple vendors quickly | Returns and exchanges can be complicated |
| Some vendors offer kiln-dried, stable wood options | Potential for variation in wood color and grain from photos |
Before ordering online, look for vendors with high ratings and generous return policies. Request clear photos of the actual boards you’ll receive whenever possible. If your project demands extremely stable or figure-specific wood, consider ordering small test pieces first. Online lumber shopping works best when combined with local sources and personal inspection experience to balance convenience with the hands-on knowledge necessary for selecting the perfect lumber.
Decoding The Lumber Yard Lingo
Understanding Board Thickness Terminology
When you shop for lumber, the thickness listed isn’t always the exact dimension you get. Terms like “1-inch” or “2-inch” boards are often nominal sizes, which means the finished thickness after drying and planing is less than the labeled size. For example, a “1-inch” board typically measures around ¾ of an inch thick once surfaced smooth. This discrepancy can lead to frustration if you expect a full inch of thickness for joinery or milling.
Dimensional lumber is generally sold in nominal sizes to simplify pricing and inventory, but it pays to get familiar with the actual dimensions. A “2x4” board, commonly used in framing, actually measures about 1½ inches by 3½ inches. For woodworking, especially fine furniture making, knowing these true sizes helps you accurately estimate material needs and avoid surprises when you bring the wood to your bench.
Calculating Board Feet: The Essential Math
Board feet measure wood volume and are one of the most common ways lumber is priced. A single board foot equals a piece of wood 12 inches long, 12 inches wide, and 1 inch thick. To calculate board feet for any board, use the formula: (thickness in inches × width in inches × length in feet) ÷ 12 = board feet. This means if you buy a board that’s 1 inch thick, 6 inches wide, and 8 feet long, you have (1 × 6 × 8) ÷ 12 = 4 board feet.
Grasping board feet lets you compare prices between different lumber sizes and helps you budget accurately for your projects. Instead of just paying per piece, you’ll understand the actual volume of wood you’re getting, making it easier to source the right amount of material without waste.
Keep in mind that suppliers might also price wood by linear feet or square feet, depending on the species or cut, but board feet remains the universal standard for hardwood lumber. Mastering this simple math gives you an advantage right at the lumber yard and when ordering wood online or by phone.
The Role of Moisture Meters in Woodworking
Why Moisture Content Matters
Wood's dimensional stability dramatically depends on its moisture content, which directly affects how much the wood will expand or contract after you bring it into your workshop. Lumber that has too much moisture can shrink significantly as it dries, causing joints to loosen, panels to warp, or cracks to form in your project over time. On the other hand, wood that is too dry might absorb moisture from the environment, potentially swelling and ruining tight-fitting assemblies.
Most hardwood lumber destined for furniture or fine woodworking is best used at a moisture content of around 6% to 8%. This level generally matches the equilibrium moisture content (EMC) of interior environments in many climates. Using wood outside this range means your project might shift unpredictably, introducing structural and aesthetic problems down the line. A moisture meter helps you to gauge this and avoid selecting lumber that could cause headaches later.
Selecting the Right Moisture Meter for Your Needs
There are two main types of moisture meters to consider: pin meters and pinless meters. Pin meters use sharp probes that penetrate the wood surface to measure electrical resistance between the pins, giving an accurate moisture percentage. Pinless meters use electromagnetic signals to measure moisture without damaging your lumber, scanning beneath the surface for a quick reading. Pin meters offer precise spot-checks, while pinless meters provide rapid, non-invasive readings over larger surfaces.
Pin meters tend to be favored for their accuracy on rough or unvarnished wood surfaces, especially when you want precise moisture content at specific points. Pinless meters excel when you want to scan multiple boards quickly without leaving holes or marks, making them popular for checking lots of lumber at the yard. Both types typically offer wood species calibration settings, since moisture readings can vary depending on the wood’s density and composition.
When choosing a moisture meter, consider the types of projects you usually build and how you source your lumber. If you’re buying lumber from various suppliers or milled boards, a combination meter offering both pin and pinless features can provide the most flexibility. Also look for meters with clear digital displays, species-specific calibration options, and a measurement range that covers from 5% to 30% moisture content to handle both kiln-dried and green wood accurately. Investing in a reliable meter pays off by preventing costly mistakes due to hidden moisture issues in your wood.
The Importance of Acclimatizing Your Wood
Why Acclimation is Crucial
Wood contains moisture when freshly milled or purchased, and this moisture content will change as the wood adjusts to the environment where it will be used. If you start building immediately after bringing lumber home, you risk the wood shrinking, expanding, or warping as it loses or gains moisture. This movement can cause joints to open up, cracks to form, or panels to cup, all of which will compromise the integrity and appearance of your finished project. For example, in regions with seasonal humidity swings like Virginia, lumber straight from the store may be much wetter than your workshop air during winter, causing unexpected shrinkage over the coming weeks.
Projects with glued and joined parts are especially sensitive to wood movement after assembly. When wood hasn't been allowed to stabilize, you may find that panels no longer fit properly or that gaps develop along edges. This is a common problem for cabinetmakers who skip acclimation and results in expensive rework. Acclimation avoids these headaches by letting your material “settle” into equilibrium moisture content relative to your shop’s climate, minimizing future dimensional shifts.
How to Acclimate Your Lumber Effectively
Start by stacking your lumber off the ground in a well-ventilated space where temperature and humidity reasonably reflect your final environment. Insert stickers—thin, evenly spaced strips of wood—between boards to promote air circulation on all sides. Aim for a sticker spacing of about 16 to 24 inches to prevent sagging and ensure even drying. Avoid tight piles or wrapping lumber in plastic, which trap moisture and promote uneven acclimation or even mold growth.
Thickness and wood species influence acclimation time: thinner boards might stabilize in just a few days, but thick slabs or dense hardwoods like hard maple can take several weeks to reach equilibrium. Measure moisture content periodically with a reliable pin or pinless moisture meter to track progress; values within 6-8% MC (moisture content) generally indicate readiness for use in most indoor projects. If you rush this process, you risk finishing and joining wood that will still move after assembly.
Acclimating wood also means accounting for seasonal variations. For example, if you plan a project during a dry winter, try to acclimate wood in similar conditions—not the humid summer air where it might absorb extra moisture only to shrink later in your dryer shop. Some woodworkers even acclimate lumber inside the finished house to match future internal climate. This approach helps avoid surprises once your piece is placed in its intended location and reduces the odds of cracks or loose joints down the line.
Project Planning: Choosing the Right Wood for Your Needs
Matching Wood to Project Requirements
Matching wood characteristics to the specific demands of your project can save you from costly mistakes and ensure your piece performs well over time. For instance, if you're building a dining table that will see daily use, selecting a hardwood with a Janka hardness rating above 1,200—such as white oak (1,360) or hard maple (1,450)—provides durability against dents and scratches. Conversely, for decorative elements or parts that won’t face heavy wear, softer woods like Butternut or Western Red Cedar offer ease of shaping and a lighter weight without sacrificing visual appeal.
Outdoor projects require special attention to wood’s natural decay resistance. Species like black locust, cedar, or teak contain oils and compounds that fend off rot and insect damage, extending the life of your creation without chemical treatments. Keep in mind that wood movement due to humidity will affect joinery and stability, so parts under structural stress—like legs or frame members—benefit from quartersawn stock for dimensional stability, whereas panels can use more decorative but less stable cuts.
Considering Aesthetics vs. Functionality
Balancing beauty and purpose often leads to compromises in woodworking. A highly figured top with striking grain patterns, such as quilted maple or crotch mahogany, can demand painstaking selection and come at a premium price, but it can elevate a piece to works of art. If the visual centerpiece isn't meant for everyday tough use—say, a cabinet door or tabletop in a low-traffic room—opting for this aesthetic wood makes sense. However, using rare or visually stunning wood for structural components may lead to frustration due to difficulties in machining and less predictable behavior in humidity changes.
Selecting more utilitarian woods like hard maple or ash for legs, stretchers, or drawer sides lets you apply your budget where surface beauty counts most. This approach echoes traditional furniture making, where softer woods or lower-grade boards served as concealed parts, while hardwoods with appealing grain were reserved for faces and visible surfaces. Combining woods also offers creative opportunities—for example, pairing a soft but stable wood for a door panel surrounded by a quartersawn hardwood frame provides both visual contrast and functional longevity.
The decision also extends to finish compatibility and wear patterns. Some woods take stain and varnish differently, altering their color saturation and highlighting grain in unique ways. Cherry darkens significantly with age and UV exposure, softening a room’s lighting, while white oak’s open grain patterns lend themselves well to textured finishes. Weighing these factors alongside projected use will help you avoid costly rework or finish failures down the line.
Maintenance and Care of Your Lumber Stock
Storing Wood Properly: Best Practices
Stacking lumber with consistent spacing between boards encourages airflow and helps prevent moisture buildup that leads to warping or mold. Using stickers—thin, evenly sized pieces of wood placed between layers—ensures air circulates on all sides of each board. Ideally, keep your lumber elevated off the floor on a level surface to avoid ground moisture absorption. A well-ventilated, sheltered environment with stable temperature and humidity levels will go a long way toward preserving your wood’s integrity.
Organize lumber vertically or horizontally depending on your shop setup, but avoid leaning boards against walls at an angle, which can cause them to bend or bow over time. If outdoor storage is unavoidable, cover the stack with a breathable tarp that sheds water yet allows moisture to escape. Excessive exposure to rain or sun can cause checking, end splits, or drying too fast, which damages the wood fiber and complicates later milling and finishing.
Preserving Quality Over Time
Clocking proper acclimation time before machining lumber prevents surprises caused by seasonal moisture changes. Six months to a year of controlled drying can reduce internal stresses that cause twisting or cupping once the wood is cut and incorporated into furniture or tools. For species prone to heavy movement—like Cherry or Walnut—monitor relative humidity and consider using a dehumidifier or humidifier in your storage area to maintain a consistent environment near 40-60% RH.
Applying a protective sealant or wax on end grain surfaces slows down moisture loss and reduces checking during storage. This method is especially helpful for wider boards or quartersawn wood that you want to keep stable. Routine inspection of your stock for signs of insect damage, mold, or splitting allows you to address issues early and avoid costly material loss.
Another approach to maintaining quality lies in understanding each species’ typical response to your local climate. For instance, hardwoods sourced from temperate zones often fare differently in tropical or arid workshop conditions. Tracking these patterns over time sharpens your judgment on how long to store lumber and which boards to prioritize for upcoming projects, thereby avoiding material degradation and waste.
Expert Tips for First-Time Lumber Buyers
What to Ask at the Lumber Yard
When you arrive at the lumber yard, some targeted questions can save you from costly mistakes and help you find the right boards efficiently. Ask about the origin of the wood, especially if you want local species or sustainably harvested lumber. Inquire whether the boards have been kiln-dried or air-dried, since moisture content affects wood movement and stability in your project. Most hardwood lumber should have a moisture content between 6-8% for indoor furniture, so confirm these details with the yard staff.
Another good question relates to the milling cut of the lumber—whether it’s flat sawn, quartersawn, or rift sawn. A quick check of the end grain or asking the supplier can clarify this. Quartersawn boards usually carry a premium price but provide markedly better dimensional stability. Also, find out if the lumber yard offers any grading options or select lumber sections. Higher grades typically mean fewer defects like knots or sapwood, which might be critical depending on the project’s finish requirements.
Common Pitfalls to Avoid
Many beginners assume that all boards labeled “hardwood” will perform similarly, but skipping the Janka hardness or grain orientation check can lead to using lumber that’s prone to dents or warping. Avoid buying boards solely based on appearance—especially if the ends are sealed or painted—which hides important clues about the wood’s cut and moisture condition. You should also avoid settling for the first boards you see; lumber yards often stock a mix of quality, so taking time to search, plane the ends, or inspect the grain can uncover better stock.
Beware of impulse buying too much lumber at once, particularly if the stock hasn’t been acclimated to your workshop environment. Wood that hasn’t adjusted to your local humidity can twist or cup as it equilibrates, causing headaches down the line. Pay attention to the presence of sapwood versus heartwood in species known for instability, as sapwood is usually softer and less durable. Don’t overlook asking for boards with particular grain orientation to match the functional and aesthetic needs of your project.
Additionally, some shops don’t label or separate quartersawn lumber clearly, so relying on visual cues alone without experience can result in purchasing less stable flat sawn pieces. Carrying a sharp block plane or a magnifying glass for end grain inspection allows you to confirm the milling cut on site. After investing time in understanding these details, your project will have a much stronger foundation and reduce the number of surprises during build and finish stages.
Case Studies: Successful Wood Projects
- Shaker Wall Clock by Will Myers: This project combines hardwood Butternut for the case and door frames with soft white pine for the clock face panel and dovetail board. The mix demonstrates how using softer hardwoods and softwoods strategically can reduce overall cost while maintaining durability where needed.
- Portable Moravian Workbench: The undercarriage of this workbench is constructed with economical softwood lumber, while the top, vise, and structural parts feature white oak, red oak, ash, and maple—hardwoods that endure heavy use. This example reflects historical workbench building techniques and balances strength with budget.
- Violin Construction: Violin makers employ Sitka Spruce, a softwood, for the soundboard due to its superior resonance, contrasted with harder maple for structural elements like the back, ribs, and neck. This shows how wood properties influence sound quality and stability in instrument making.
- Quartersawn White Oak Doors: Using quartersawn white oak for door frames reduces wood movement dramatically, preventing warping and joint failure in climates with humidity swings. This enhanced dimensional stability justifies the premium cost of quartersawn lumber.
- Custom Wooden Hand Tools: Hand planes and try squares made from quartersawn lumber provide stability and resistance to twisting or warping, critical for maintaining calibration and accuracy during use and storage.
- Mixed Quarry Sawn and Rift Sawn Coffee Table: A table crafted with a rift-sawn maple top offers consistent straight grain for a clean modern look, paired with quarry sawn cherry legs for visual contrast and structural sturdiness.
- Restoration of Antique Furniture: Selecting lumber matching original grain orientation and species prevented mismatches and ensured long-lasting repairs on a 19th-century sideboard, demonstrating the importance of milling cut choice in restoration work.
Learning from Experienced Woodworkers
Watching skilled woodworkers such as Will Myers in action reveals how deliberate lumber choices impact both aesthetics and function. For instance, his selective use of Butternut as a softer hardwood for non-wear surfaces contrasts sharply with the deliberate application of white pine for panels, showing how mixing woods tailors performance to each component. This kind of decision-making comes from experience and observing how wood behaves in different roles within a project.
You can adopt their approach by examining how they balance costs without compromising stability or beauty. When builders combine softwoods and hardwoods, they optimize resource use rather than overbuilding with expensive hardwoods throughout. Learning these nuanced details offers a model for your own projects, helping you avoid common pitfalls such as overpaying for unnecessarily hard lumber or choosing wood cuts that will warp during seasonal changes.
Analyzing Techniques and Material Choices
Projects that stand the test of time often owe their quality to aligning wood milling choices with functional needs. For example, the Moravian workbench’s use of softer lumber on the base reduces expense and weighs less, while the hardwood top resists dents and warping under heavy use. This balance between material strength and price point is common in fine woodworking, revealing that strategic selection is as much about economics as it is about performance.
Looking closely at how quartersawn lumber figures into furniture components demonstrates a deep understanding of wood movement. Since quartersawn boards minimize expansion and contraction across the width, they are often reserved for critical joinery members such as door frames, legs, and rails—parts where movement can crack joints or cause misalignment. Layering these stable pieces around less stable panels made from more decorative or figured woods yields durable yet beautiful results.
This focus on matching wood stability with function can prevent expensive mistakes. Each lumber type and mill cut brings inherent strengths and weaknesses, so comparing projects where these have been expertly matched can sharpen your eye for choosing woods and cuts that work best for your intended use, climatic conditions, and tool limitations.
The Future of Lumber in Woodworking
Innovations in Sustainable Lumber Sourcing
Recent advancements in sustainable forestry have begun to reshape the availability and quality of lumber for woodworking. Certified programs like FSC (Forest Stewardship Council) and PEFC (Programme for the Endorsement of Forest Certification) are making it easier for you to find responsibly harvested wood without sacrificing quality. Some suppliers are now offering reclaimed lumber sourced from old barns, factories, and even urban trees removed for development. This reclaimed wood not only reduces the demand on fresh forests, but it often brings unique character and seasonally cured stability that you just don’t get with new lumber.
On top of that, engineered wood products are gaining traction. Cross-laminated timber (CLT) and laminated veneer lumber (LVL) provide dimensionally stable, strong, and sustainable alternatives that minimize waste and use smaller or faster-growing species more effectively. Companies are also experimenting with novel wood treatments and bio-based preservatives that enhance durability while avoiding toxic chemicals. These innovations give you more options for green woodworking projects without compromising on performance or aesthetics.
Trends to Watch in the Woodworking Community
There’s a growing movement towards embracing local and native species that are often overlooked by mainstream suppliers. Woods like black locust, sourwood, and Osage orange are prized for their hardness and decay resistance, making them attractive choices for furniture and outdoor projects. You might find more woodworkers sharing detailed species profiles online, including Janka hardness data and workability tips, making it easier for you to experiment confidently with alternatives beyond traditional favorites like oak or maple.
Another noticeable trend is the resurgence of hand tool woodworking combined with modern digital tools, such as CNC routers, to optimize material use and precision. Woodworkers are increasingly documenting and sharing their sourcing journeys and milling techniques, bridging the gap between old-school craftsmanship and new-age innovation. This blend not only improves efficiency but also deepens appreciation for how lumber selection truly impacts a piece’s longevity and character.
For deeper insight, you can explore communities like The Wood Whisperer forums or Instagram accounts where makers post detailed sourcing videos and transparent project diaries. Following these channels can give you a front-row seat to evolving lumber preferences and clever strategies for acquiring, storing, and using wood sustainably while pushing creative boundaries.
To wrap up
To wrap up, choosing the right lumber for your woodworking projects requires a solid understanding of wood types, cuts, and their characteristics. By considering factors such as hardwood versus softwood, grain orientation like quartersawn versus flatsawn, and dimensional stability, you can select wood that meets both the functional and aesthetic needs of your work. This knowledge will help you avoid common pitfalls caused by wood movement and ensure your projects hold up well over time.
As you continue to develop your skills, take the time to inspect lumber carefully and make informed decisions based on the specific demands of each piece you build. Applying this practical approach will not only save you time and money but will also elevate the quality and longevity of your woodworking creations. With experience, you’ll gain confidence in selecting and working with wood that best suits your artistic and structural goals.
FAQ
Q: How can I tell if a board is quartersawn by looking at the end grain?
A: Quartersawn boards show a distinctive vertical grain pattern on the end grain, with growth rings running mostly perpendicular to the board’s face. This vertical orientation reduces wood movement and increases stability. To check, look for tight, straight lines or ray fleck patterns, especially in species like white oak. If the ends are sealed or painted, you may need to plane a small section to expose the true grain.
Q: Is it necessary to use hardwood for every part of a furniture project?
A: Not necessarily. Many successful woodworking projects combine hardwoods and softwoods strategically. Hardwoods are often used in visible or high-stress areas, such as tabletops or structural components, due to their durability. Softer woods can be used in less visible areas or parts that experience less wear. This approach can reduce costs while maintaining performance and aesthetic appeal.
Q: How does wood movement affect joinery, and how can I minimize problems?
A: Wood expands and contracts mainly across its width in response to humidity changes, which can cause joints to loosen or crack if not accounted for. To reduce issues, use dimensionally stable lumber like quartersawn boards for critical parts, design joints that allow for wood movement, and avoid gluing or fastening across the wood grain’s natural movement direction. Proper finishing and environment control also help manage wood movement over time.
JOIN MY MAILING LIST
Hey, I’m Chuck…

I'm a 55-year-old carpenter with over 20 years of experience in creating custom furniture for family, friends, and clients alike. My passion for woodworking runs deep, and I take pride in blending traditional craftsmanship with modern techniques to produce pieces that are as functional as they are timeless. Sustainability matters to me, so I always choose high-quality, eco-friendly materials for every project. I love sharing my experiences, tips, and favorite products with fellow woodworking enthusiasts. Whether you're looking for inspiration or advice on your next project, I'm here to help guide you on your own woodworking journey.


Copyright © 2025 Woodworker Chuck | All Rights Reserved.
This website is not part of the Meta, Instagram, or Facebook.
Additionally, this site is not endorsed by Meta, Instagram, or Facebook in any way.
Facebook and Instagram are trademarks of Meta Platforms, Inc.